
Mister (NØ) likes candies. To make him happy (Ha yes ? This is Valentine’s Day ?), (NØ) concoted him a customized candy box, the well-named “Sweet (Hum ! Or Not ! ) Box”. There is something for everyone, sugary, salty candies (yes, you read correctly, but don’t tell anyone, he doesn’t know yet !), sour or soft, chewy or crunchy, fruity and juicy… (more…)
Author: 29mog@dor
-

(PICASSO MANIA)
Last Sunday, cloudy outside, cloudy inside, (NØ) was moaning… Hmm… So to spice up her afternoon, (NØ) decided to go the the art gallery and because she found it so exciting decided to share it with you!
Les Galeries Nationales du Grand Palais programmed an exposition named “Picasso Mania”, (more…)
-

( STITCH BY STITCH #01 )
Today is a special day as (NØ) goes back to school, but not a random school ! She goes back to stitch-school to offer you ten hand-embroidery stitches you must know ! Step by
stitchstep, it’s easy, have a look at the images and pretty illustrations that (NØ), as a good student, prepared for you ! To get a pretty regular embroidery, there is no choice but practice, undo to redo, unstitch to restitch …-
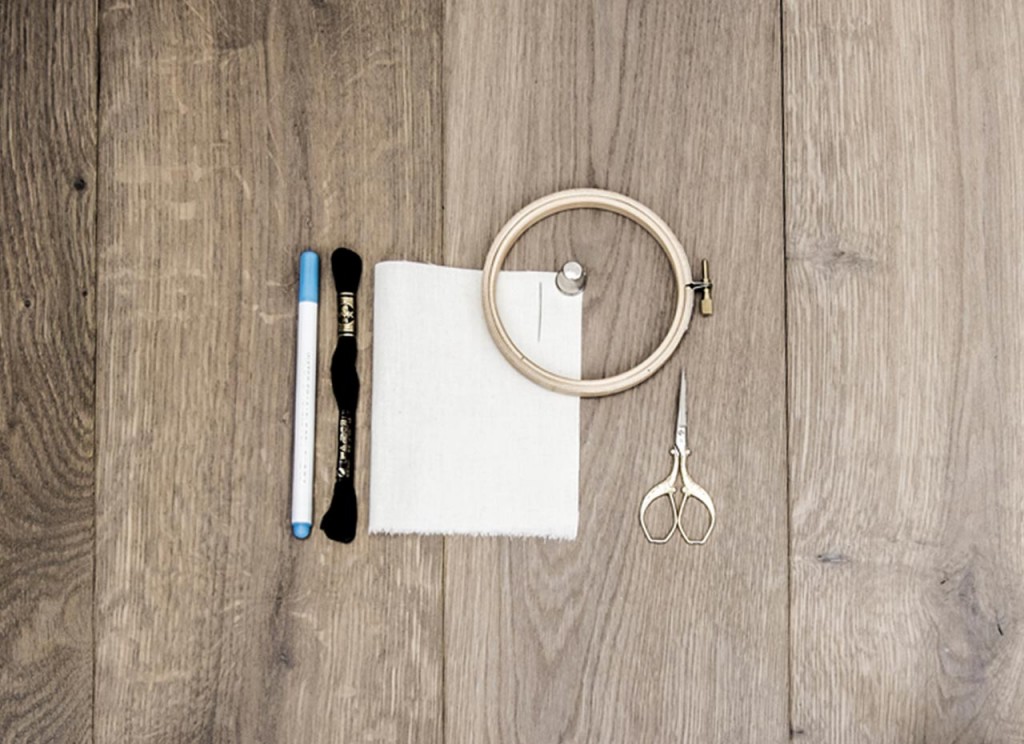
You will not need a lot :
By buying the suggested products via the links, you offer your support to (NØ)s creativity…
– 1 water-erasable marking pen or a tailor chalk to mark your drawing, you will find in every haberdashery or by Amazon
– Embroidery thread (DMC mouliné floss, using only one or two threads, or “spécial à broder” thread or any fancy thread you’d like to use !)
– Some fabric for practicing … A little cotton canvas should do for a start !
– An embroidery needle (large needle eye to avoid damaging your thread and a very sharp needle tip … watch your fingers !) you will find them in the same nice haberdashery or following this link.
– A thimble … Because the needle should be sharp!
– A hoop, you would find in your good haberdashery, in a DIY shop or by Amazon
– Sharpened embroidery scissors.-
Let’s get started !
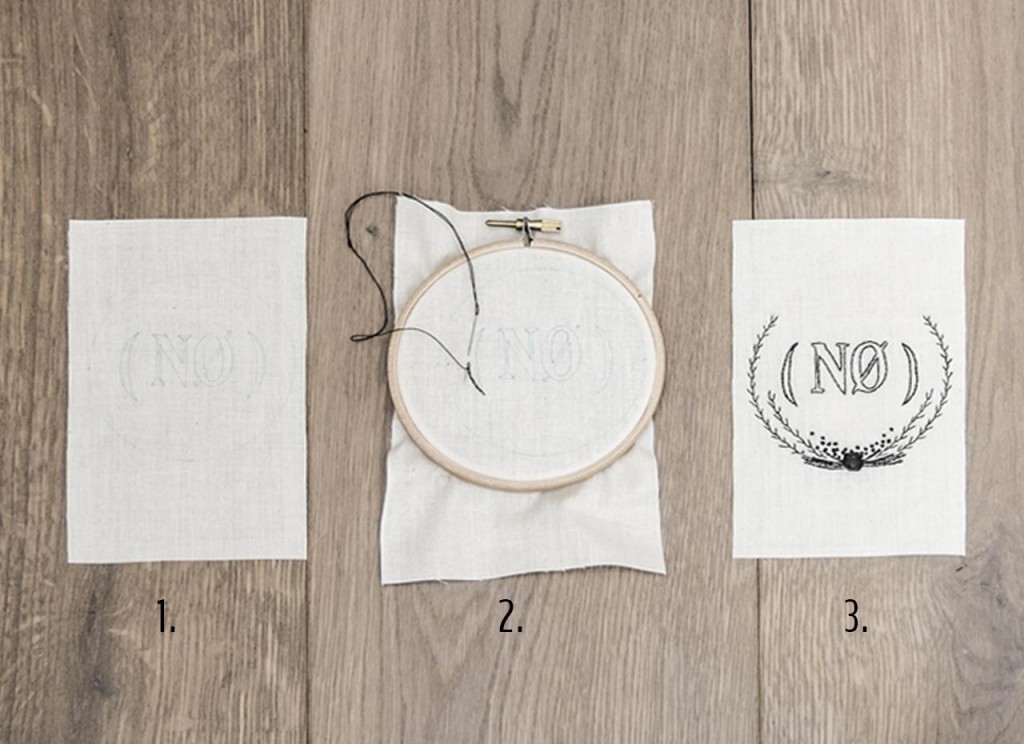 1. Using the marking pen or the tailor chalk, mark the design template on the fabric. (NØ) recommands straight lines, then curves for practicing at the beginning …
2. Place the embroidery over the inner ring of the hoop. Press the outer ring down. Tighten the screw of the hoop to secure the fabric in place. (You can use a screwdriver to tighten-up).
3. Thread the needle… Start embroider following the instructions below!
Running-Stitch :
This stitch is used to embroider straight or curved lines. The stitches need to be as regular as possible.
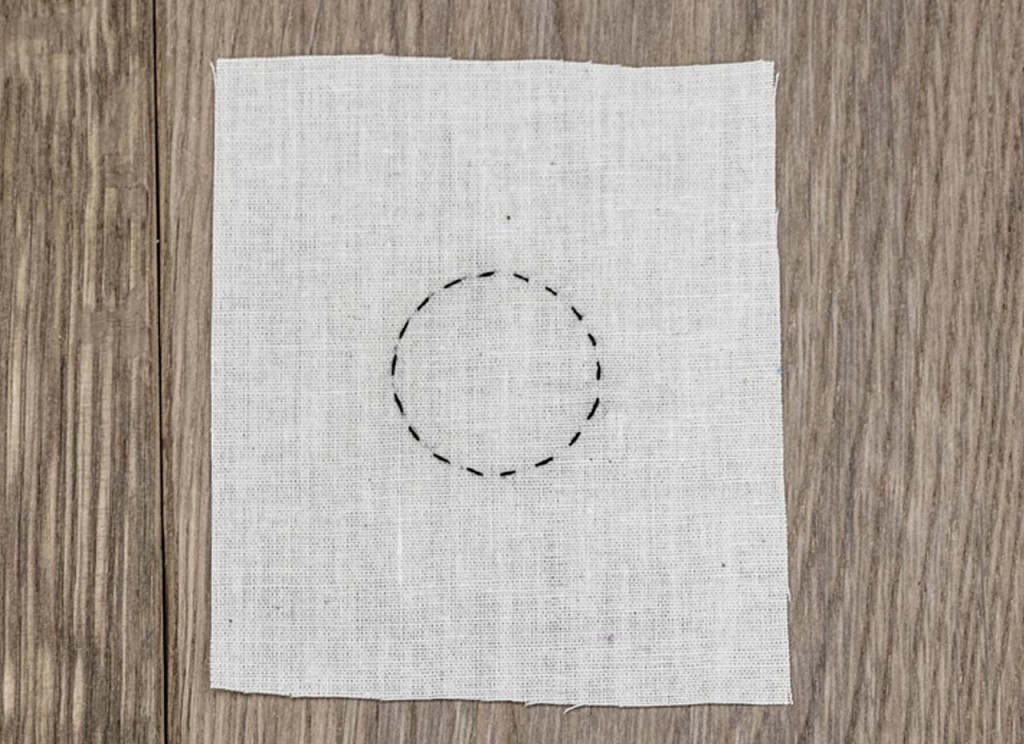
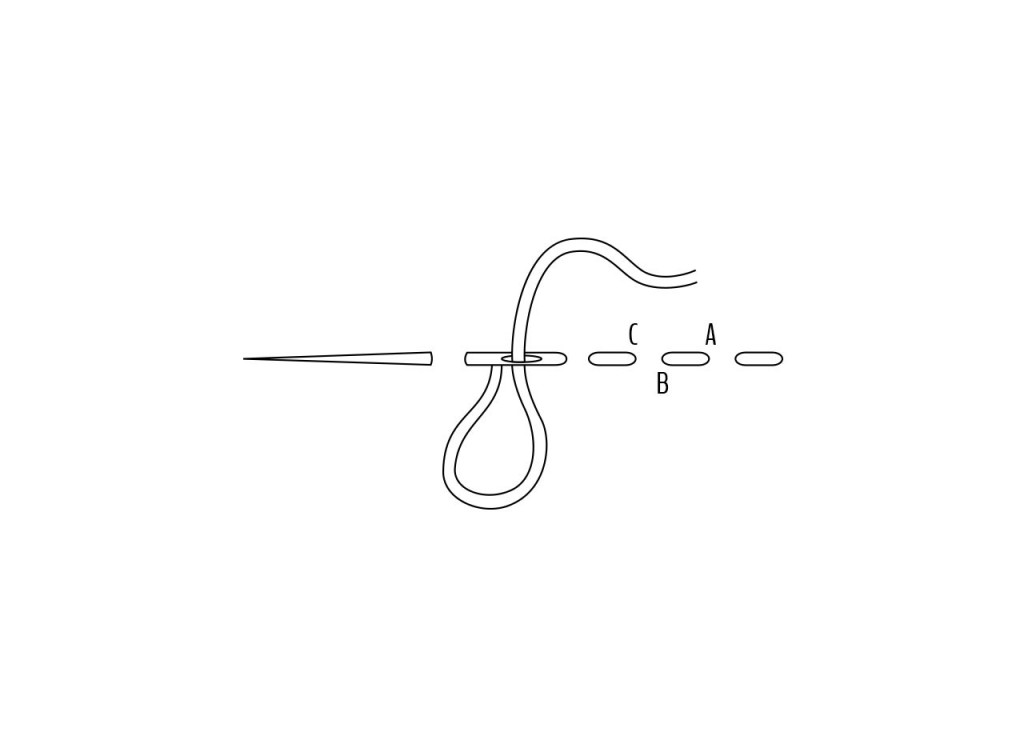 Bring the needle out through A.
Take the needle back through B and bring it out again through C to make a small stitch.Backstitch :
This stitch is used to embroider straight, curved lines or tiny details. The stitches need to be as regular as possible.
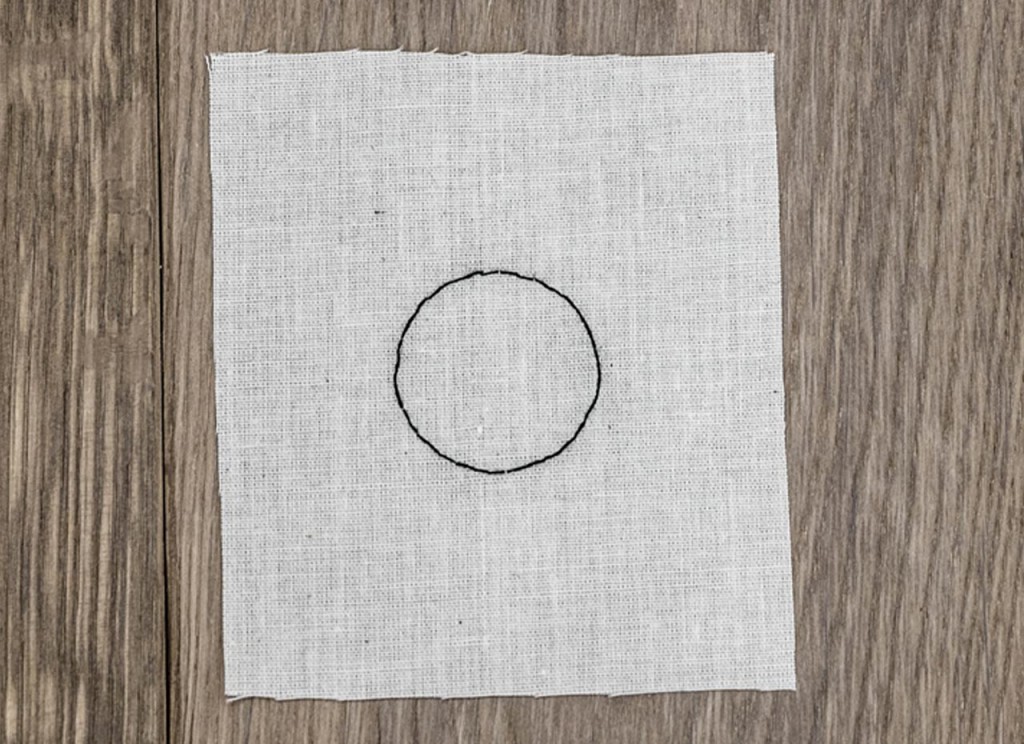
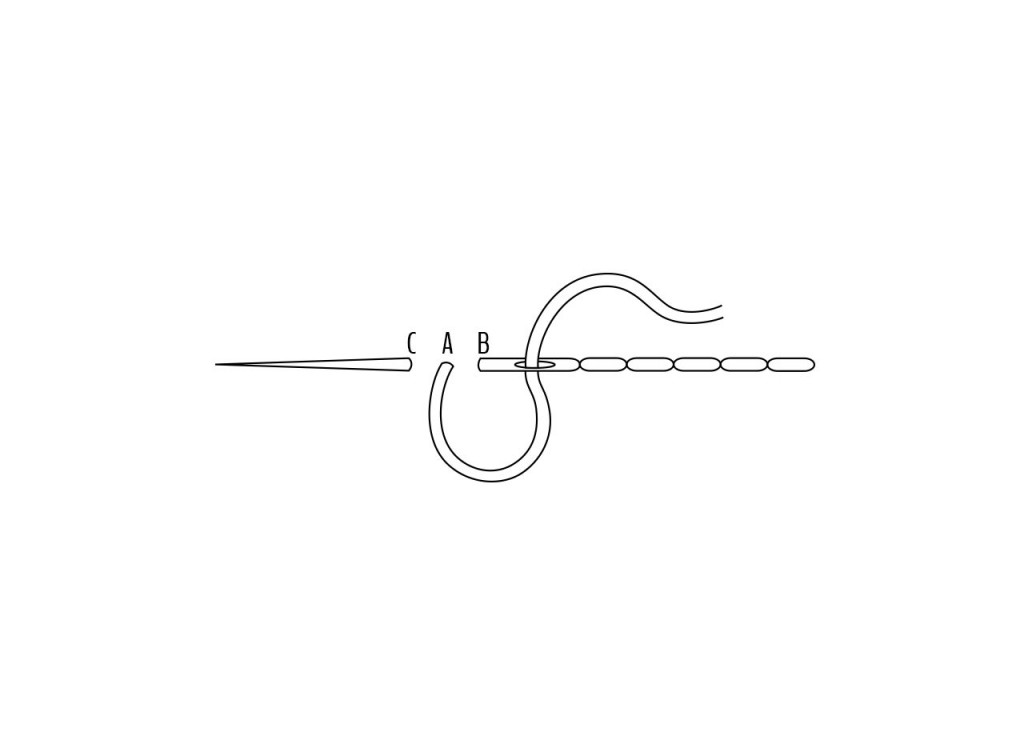 Bring the needle out through A.
Take the needle back through B and bring it out again through C. The space between A, B and C schould be the same.Stem-Stitch :
This stitch is used to embroider straight or curved lines. The stitches need to be as regular as possible except in the strong curves, where they could be a little shorter to get a smooth line.
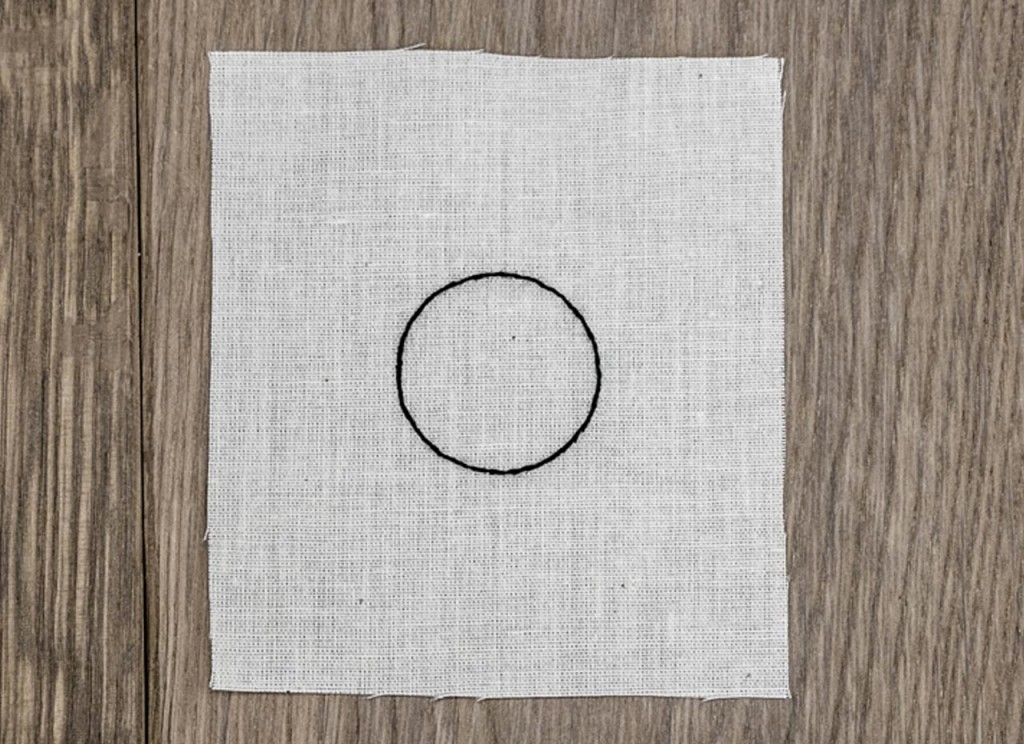
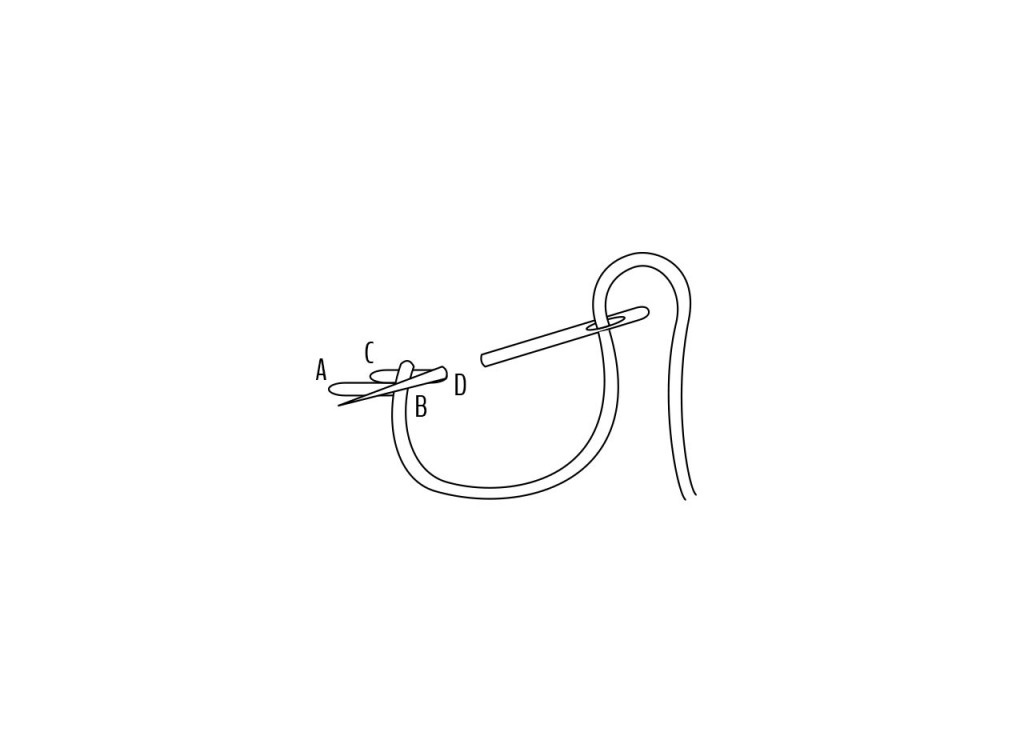 Bring the needle out through A.
Take the needle back through B and bring it out again through C, half-way between A and B a little over the sketched line.Slip-Stitch :
This stitch is used to embroider straight or curved lines. It’s also used as a filling-stitch.
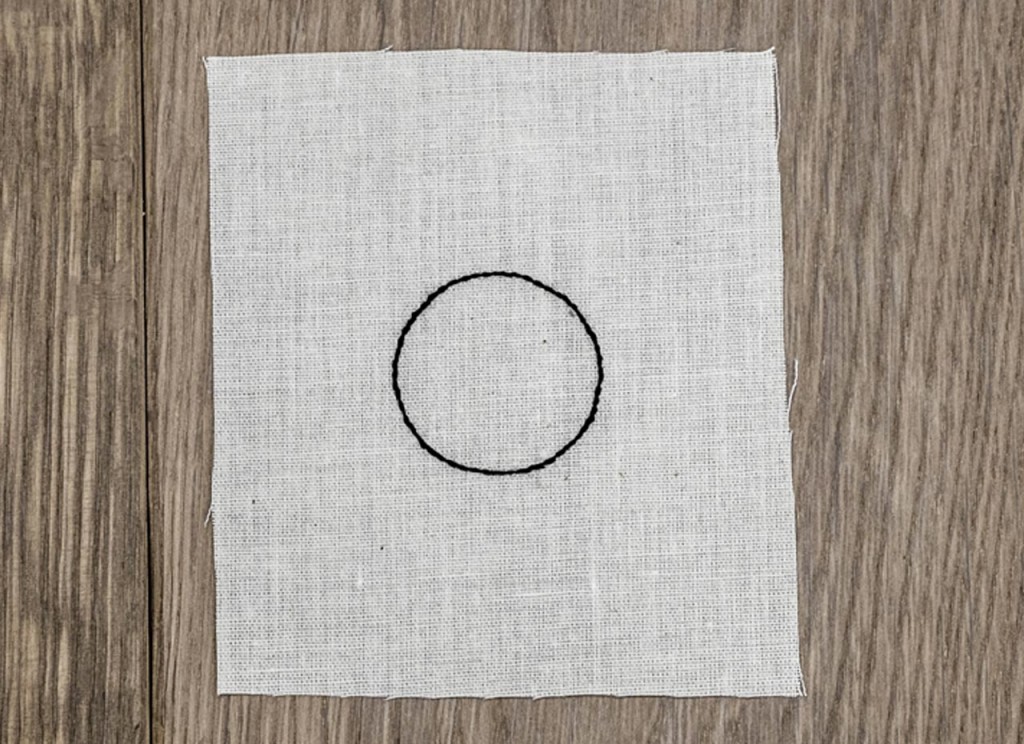
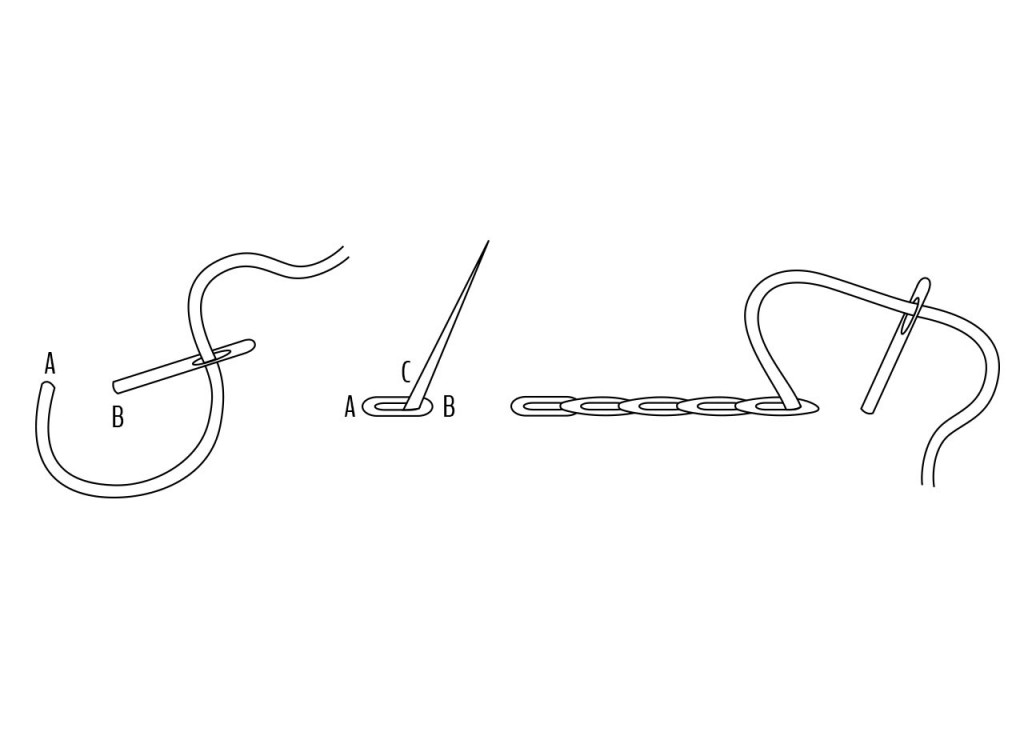 Bring the needle out through A.
Take the needle back through B and bring it out again through C, in the center of that stitch you just made, splitting the thread.Chain-Stitch :
This stitch is used to embroider bold lines, straight or curved.
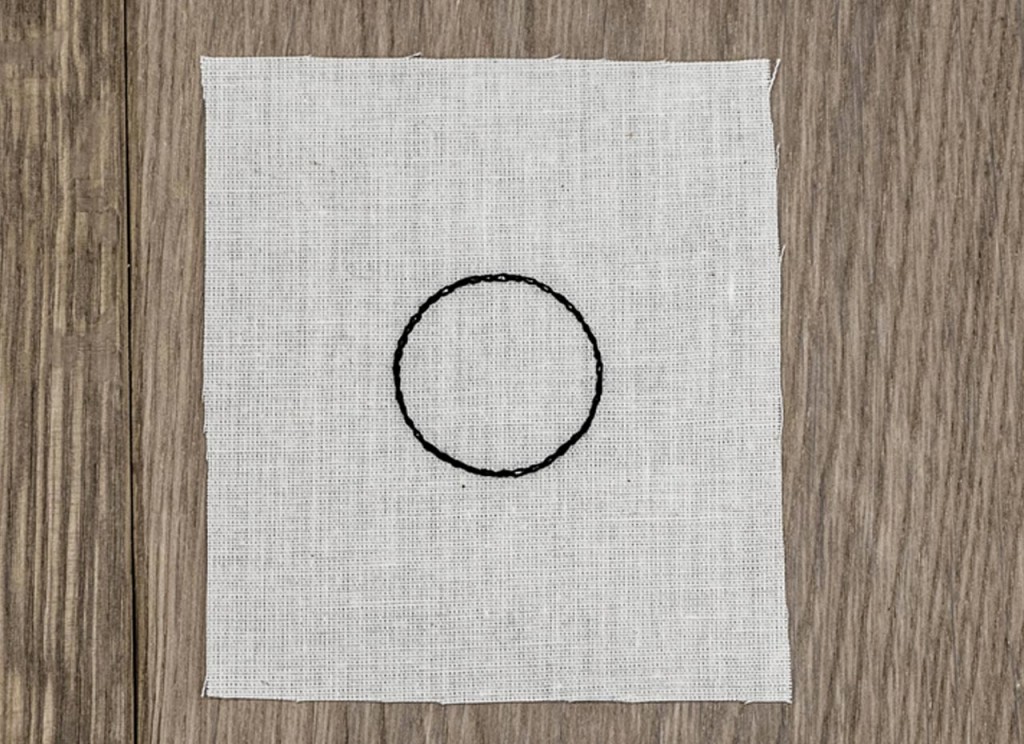
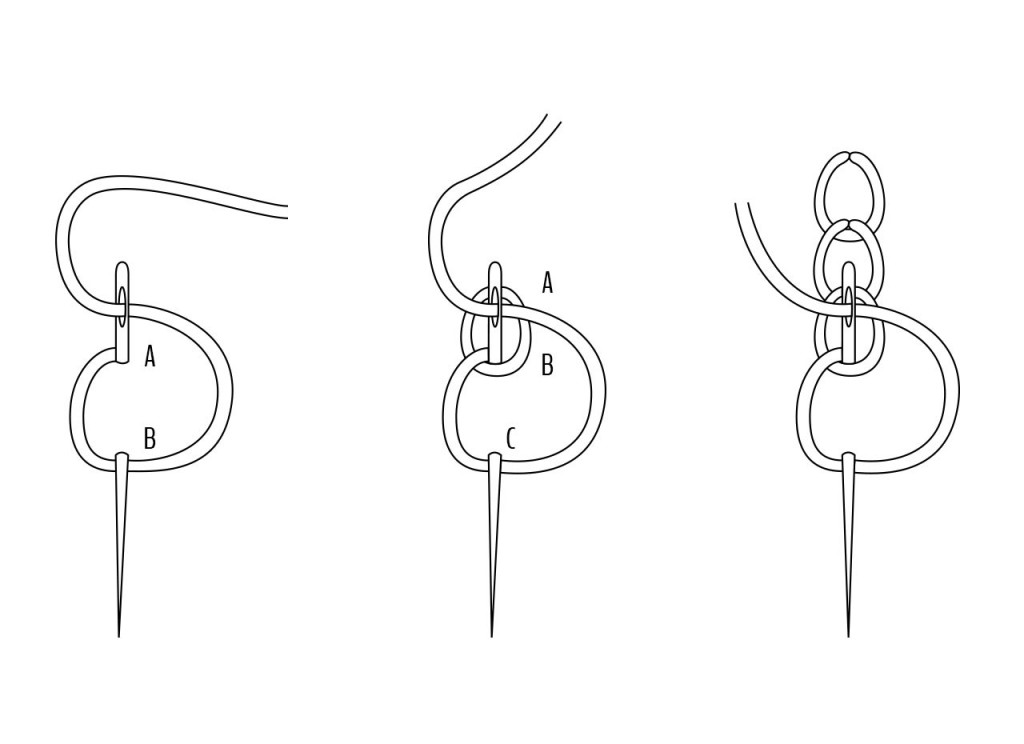 Bring the needle out through A. Take the needle back through A and bring it out again through B in the loop you just did.
Take the needle back through B and bring it out again through C. Finish with a short backstitch to fix the last loop.Blanket-Stitch :
This stitch is traditionnaly used to embroider the blankets borders. You can space the vertical stitches as you want (more space for a lighter effect, less space for a opaque effect). They will be prettier if they have the same high.
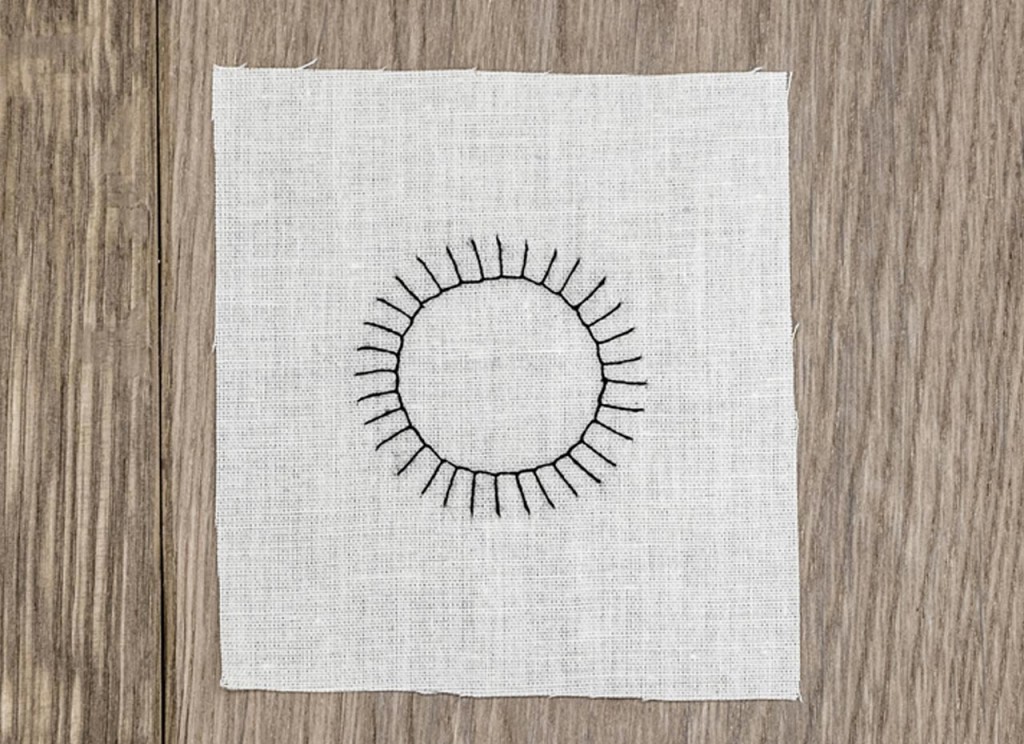
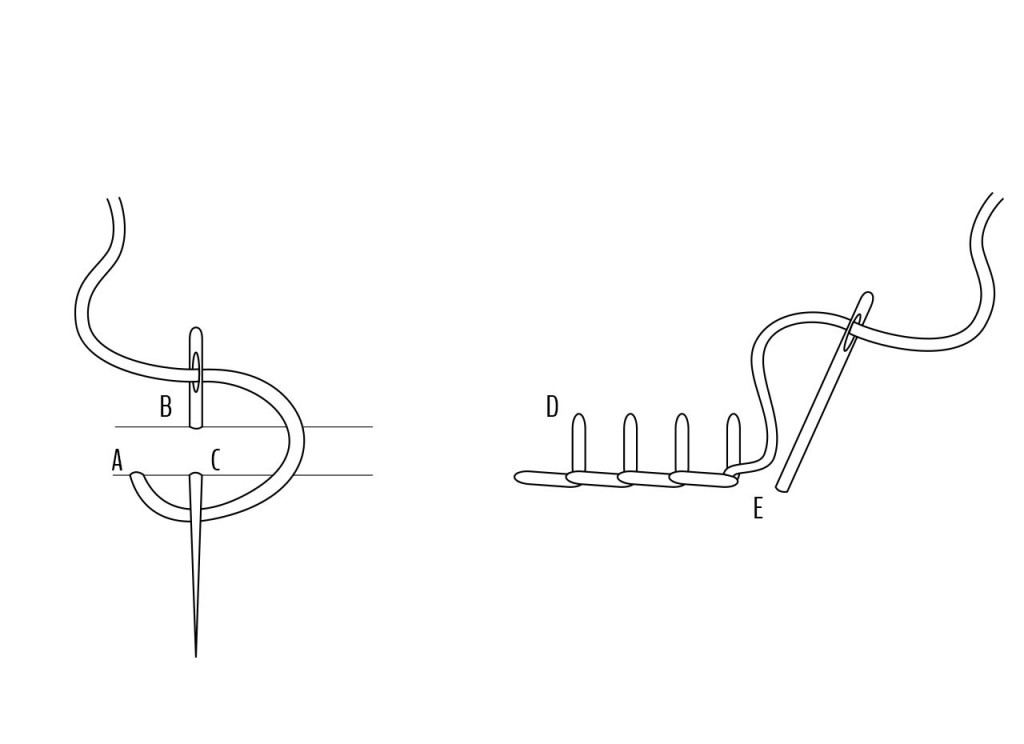 Bring the needle out through A (at the fabric edge if you embroider a blanket). Take the needle back through B and bring it out again through C leaving the thread under the needle.
Take the needle back through D. Take the needle back through E to finish.Featherstitch :
This really delicate stitch can be used to embroider some nice plant stems… The stitches can be spaced a lot to give a ligther impression or closer to get a covering effect. To get a nice line, the stitches have to be really regular and the angle of the needle has to be always the same.
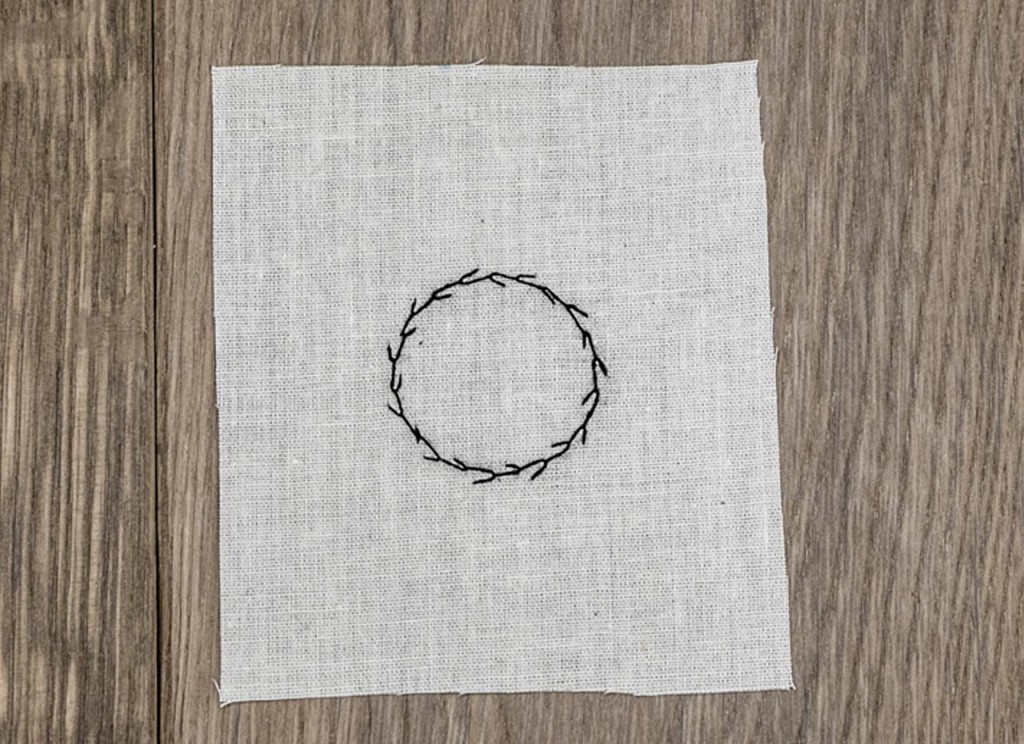
 Bring the needle out through A on the middle line. Make a loop to the right. Take the needle back through B and bring it out again through C in the loop.
Pull the needle down, holding the stitch with one of your finger. Make a loop to the left, take the needle back through D et bring the needle out through E in the loop. Make a small backstitch to fix the last loop.Satin-Stitch :
This is one of the filling-stitches used to cover small surfaces. It is especially used to give some relief to a small design or to letter bed-linen.
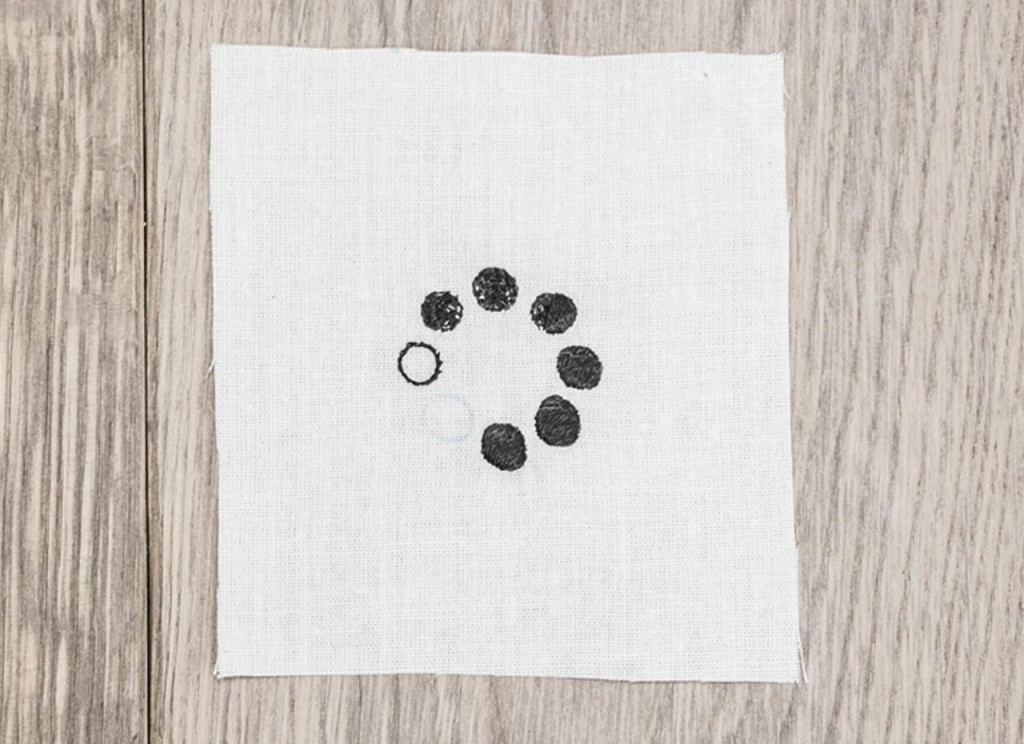
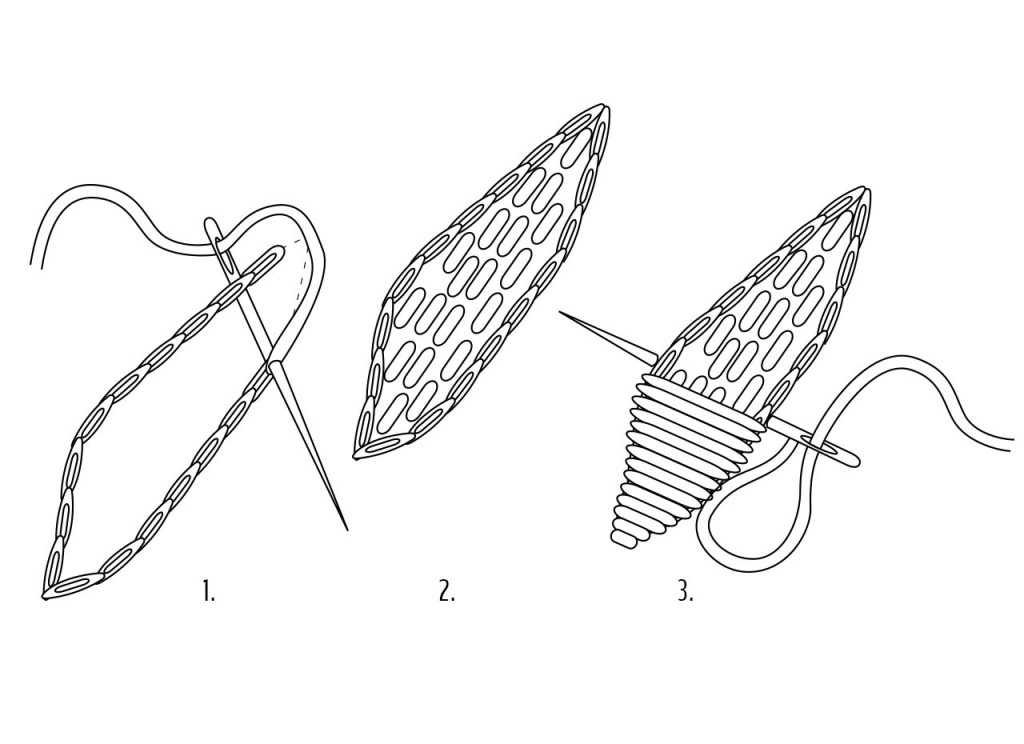
Embroider the outline of the design with a split-stitch. Fill the inside using a running-stitch or a chain-stitch or a stem-stitch. Cover the filling with the satin-stitch, from the middle of the design to the edge.
French Knot :
This small point is traditionnaly made with one thread of the floss and used as a fillinf-stitch. You can use two or three threads to get a bigger, rounder knot.
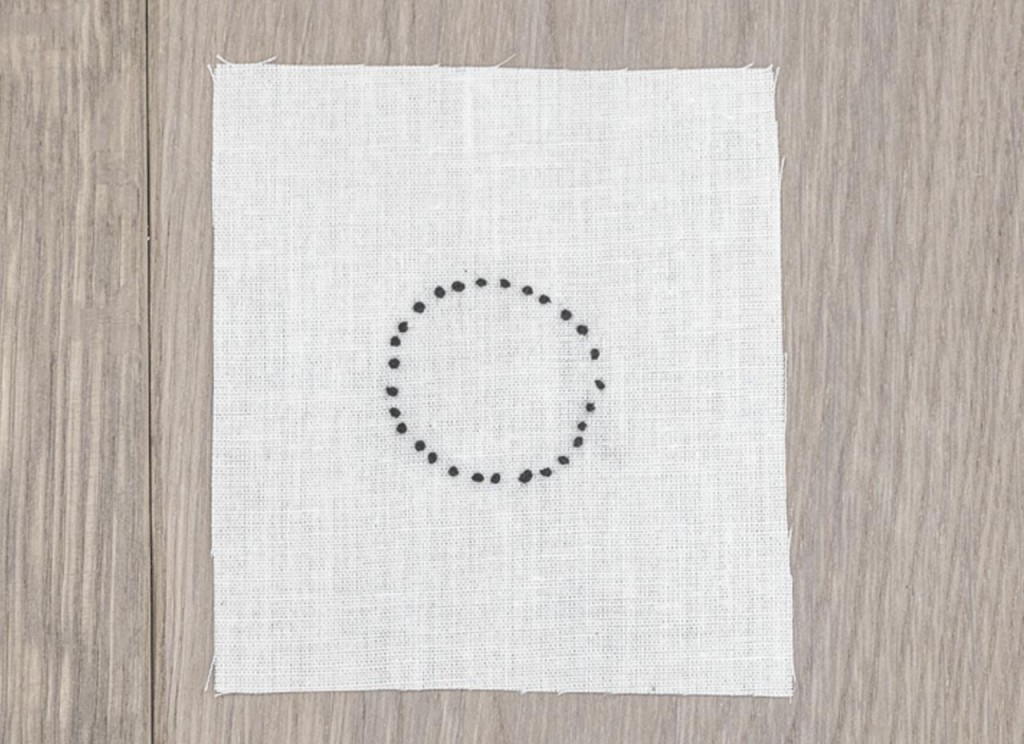
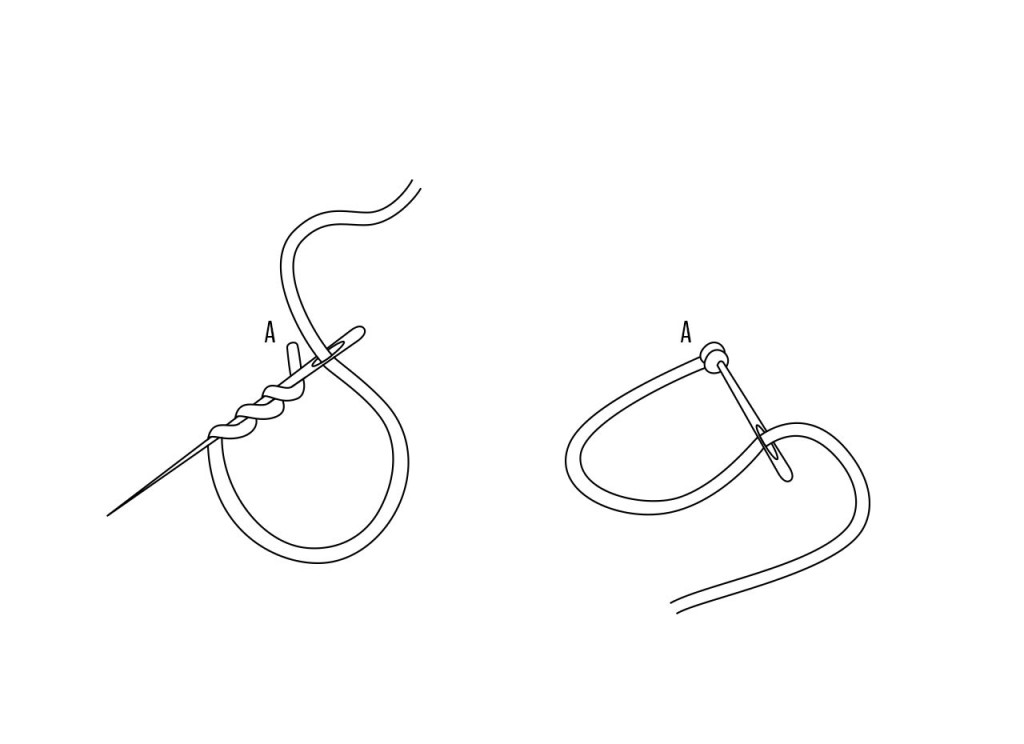
Bring the needle out through A. Wind the floss around the needle once or twice. Continue the tension of the floss with the no-needle hand to prevent it from uncoiling.
Take the needle back through B just next to A holding the wound thread with one of your fingers. Pull the needle back to fix the knot.Bullion-Stitch :
This stitch can be used alone, as a filling-stitch, a rose-stitch or as a relief line.
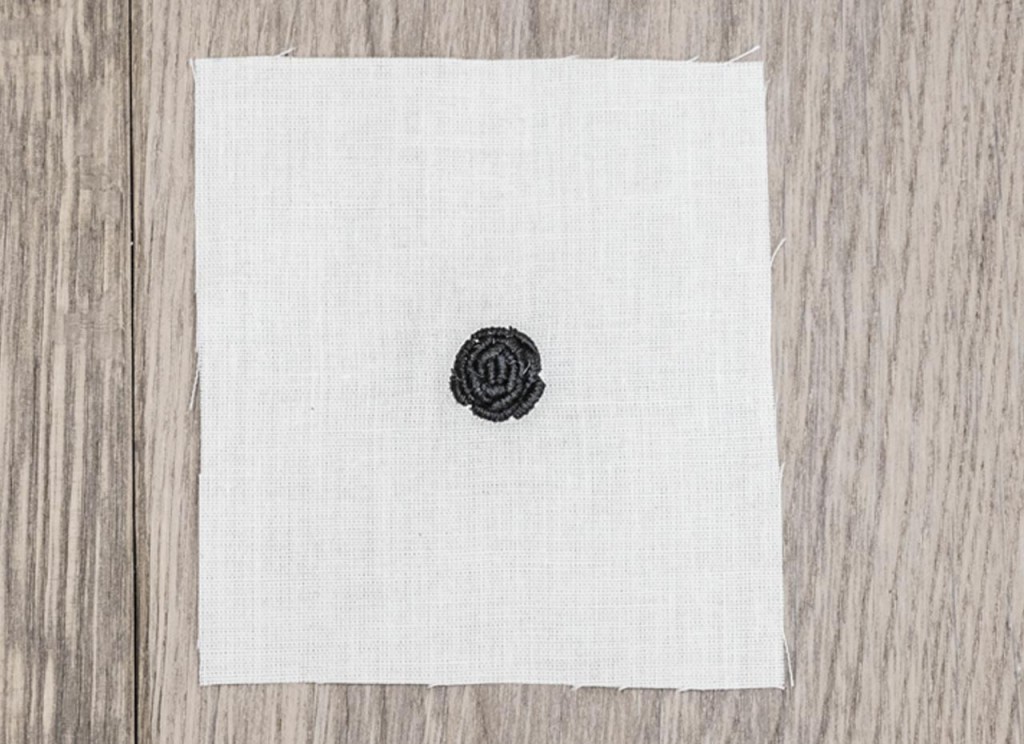
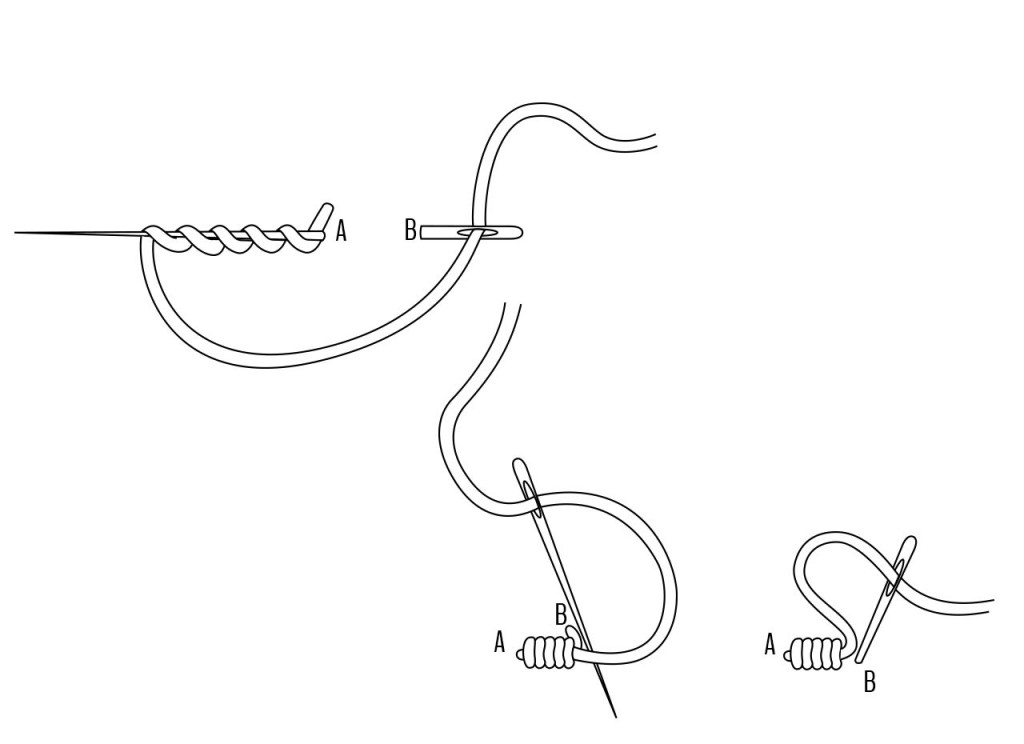 Bring the needle out through A. Bring the neddle back through B and out again through A. Leave the needle half in the fabric, not pulling on the thread. Wind the floss around the needle six or seven or nine times, according to the length of the stitch you just made. Continue the tension of the floss with the no-needle hand to prevent it from uncoiling. Push the wound thread to the fabric and pull the needle through the twisted thread.
Pull on the needle to couch the spiral on the fabric surface. Take the needle back through B again. THe spiral is now fixed on the fabric.Et voilà… Here is a little sample of stitch combinations… But possibilities are endless !
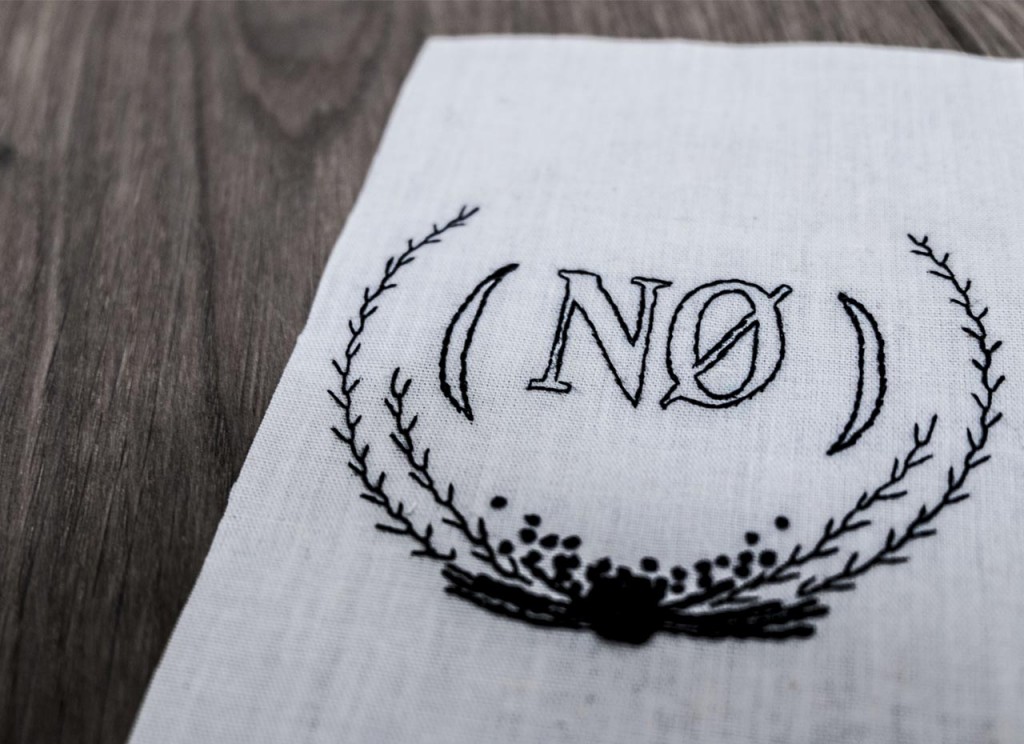 Let your imagination run wild… With those stitches, you can basically do anything ! (NØ) is very curious to see what will be your next embroidered project ! Looking for more hand-embroidery stitches? Have a look here.
-
-

( MONTHLY ORGANIZER )
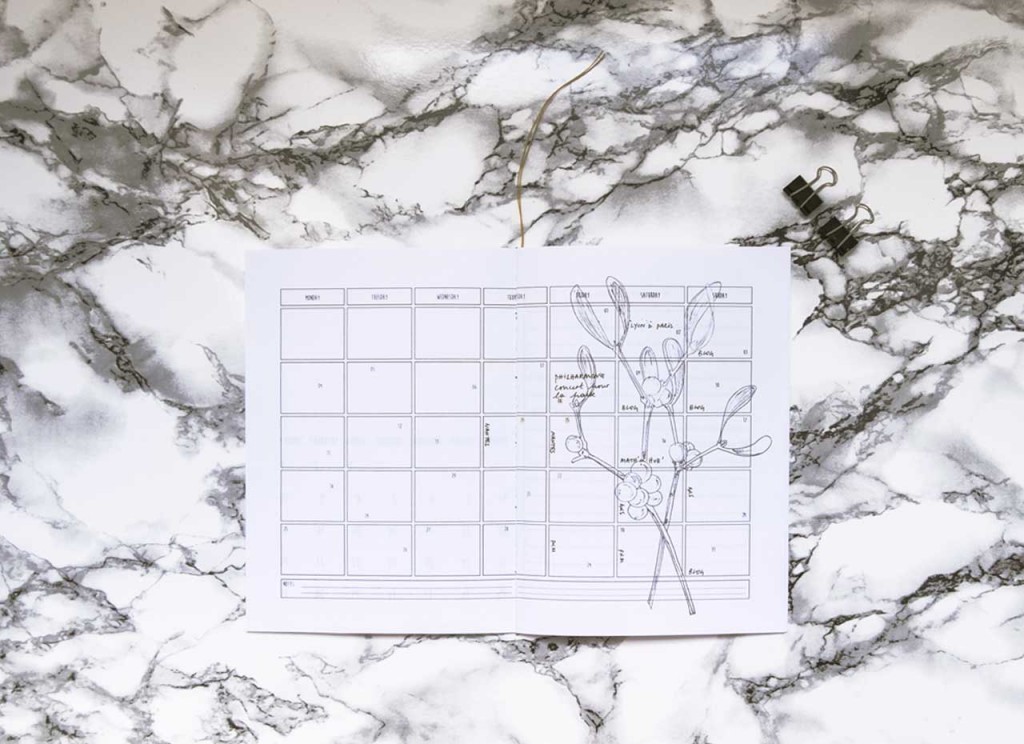
Good New Year resolutions ? Oh yes ! With this new little blog project and because (NØ)‘s head is already full of little things, big stuff, medium thingummy and other creative joys, she decided to get organized… And she is thrilled to share her notebook with you ! A printable planner organized by month for bloggers but also for everyone – arguably “old-school” – who needs a pretty piece of paper to write down their ideas !
Today, (NØ) shows you how to print and bind your organizer for the month of January… And already gives you the one for February !
To get started, you need first to download the following files:
Here the pdf document for the January planner cover page.
Here the pdf document for the February planner pages.
Here the pdf document for the February planner cover page.
Here the pdf document for the February planner pages.-
Here is how the planner looks like :
A cover page with the month printed on it.
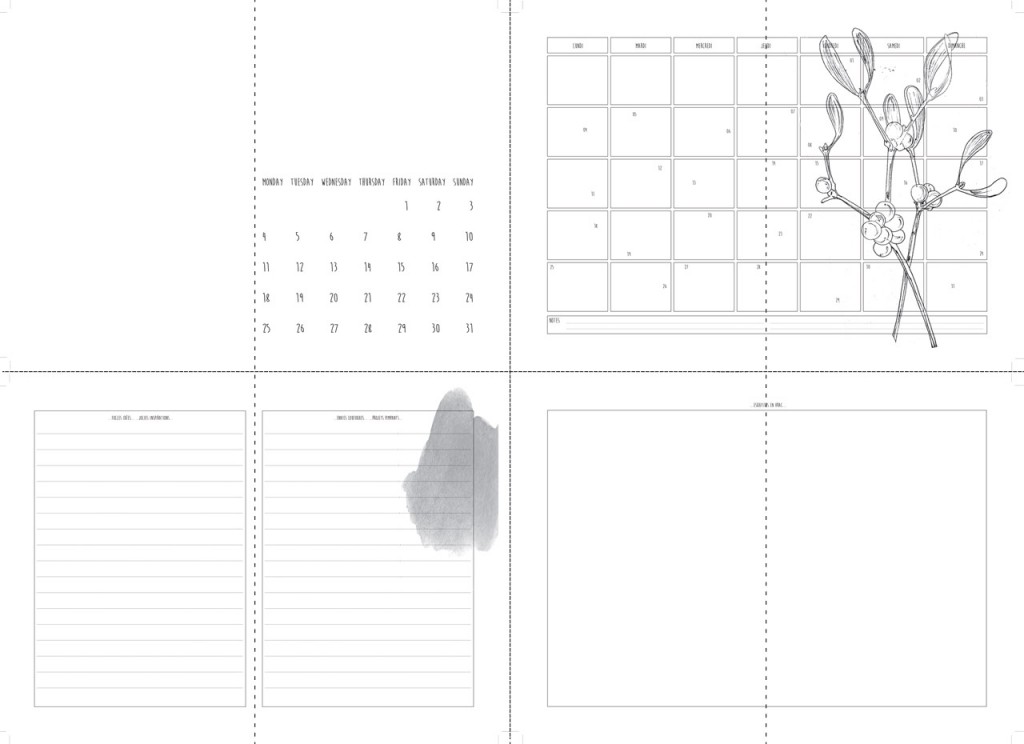
– Page 1, the month “at-a-glance”, to quickly see all the activities.
– Double page 2 and 3, daily blocks to write down important things, business meetings, appointments, travels…
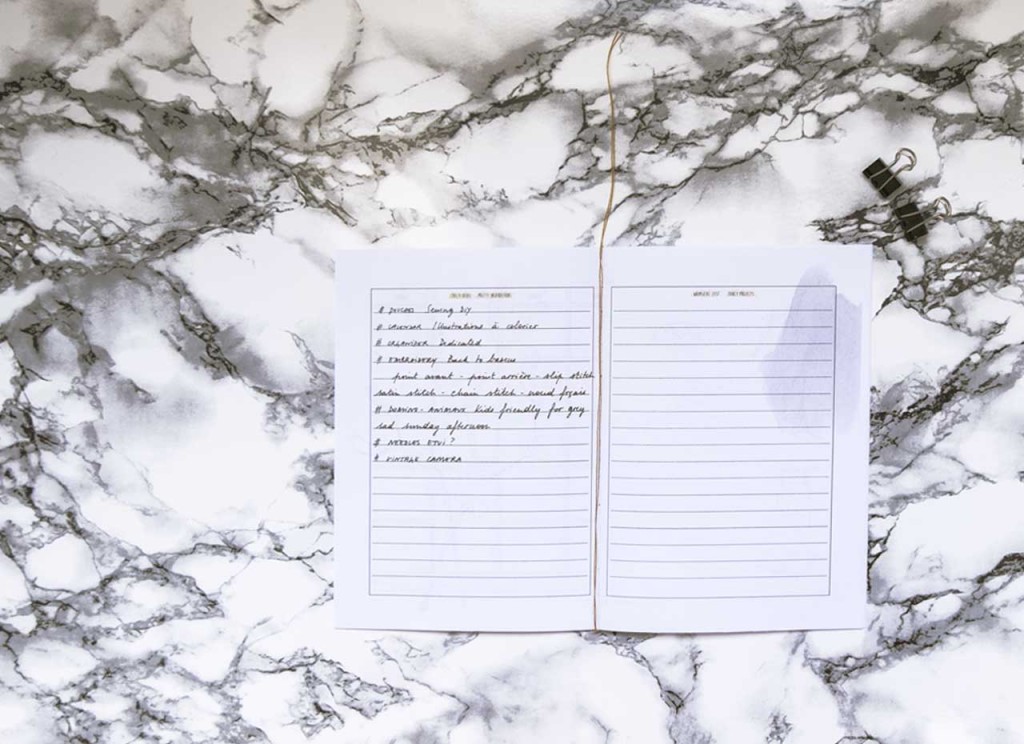
– Double page 4 and 5, the “go wild” section to write all your crazy ideas, pretty inspirations, whimsical zest and fancy projects !
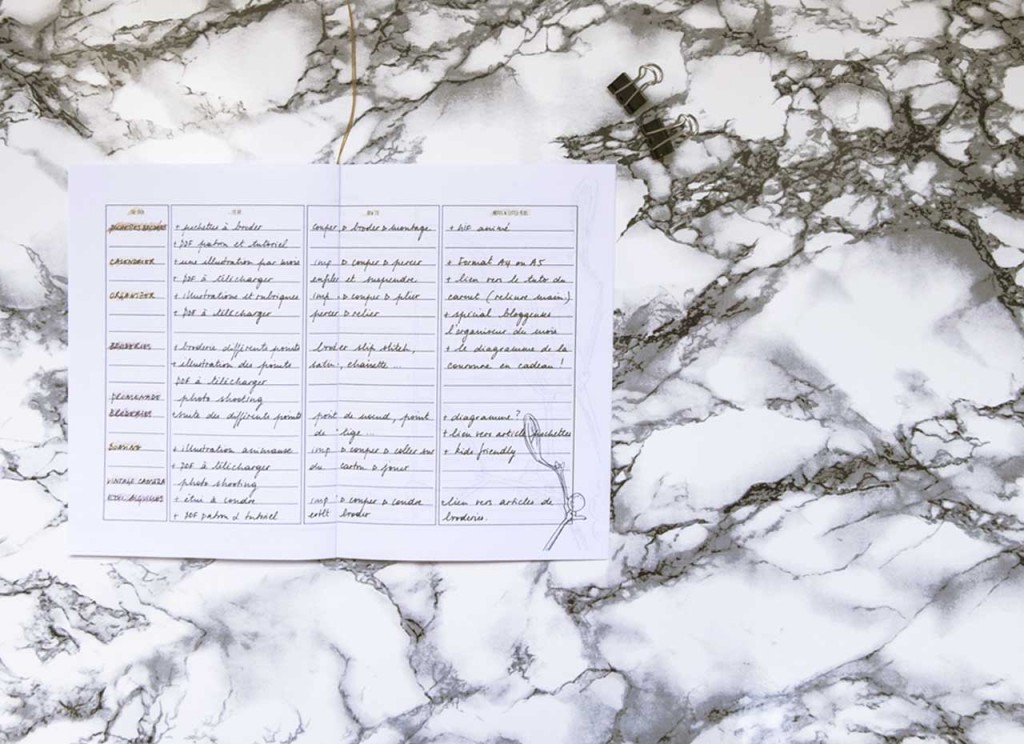
– Double page 6 and 7, a large empty frame to draw your ideas, shape them, stick your inspirations…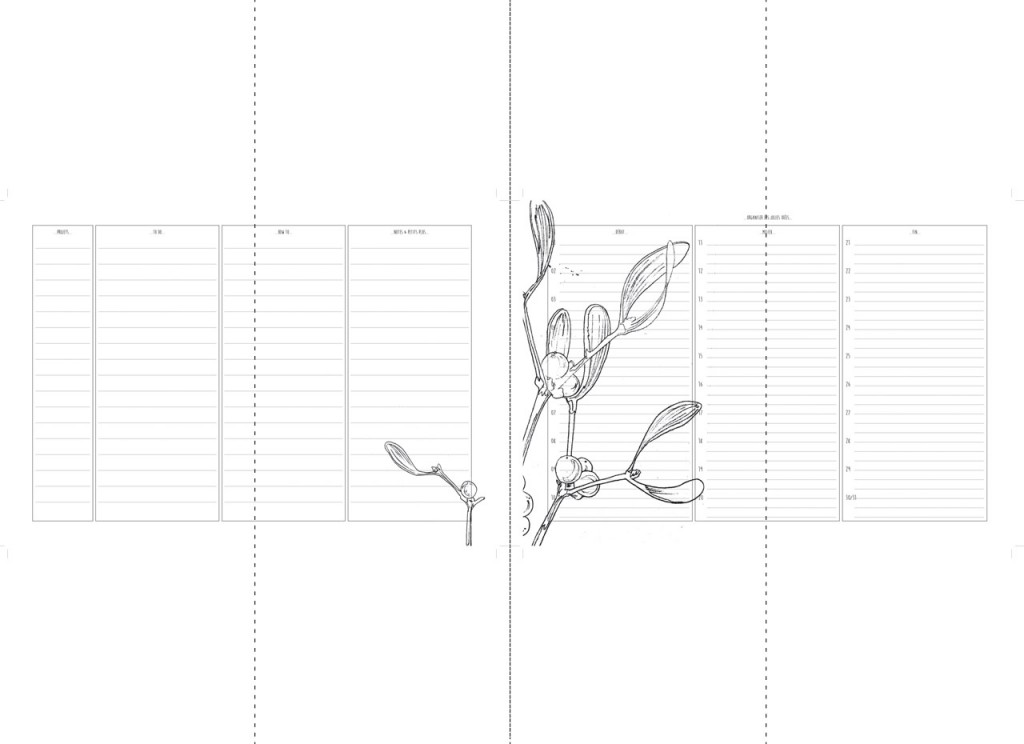 – Double page 8 and 9, that’s where it gets a bit more serious… This is the moment where you detail your ideas and transform them into actual projects. The idea, the How-to and the note section…
– Double page 10 and 11, dedicated to blog post schedule, when you will be publishing, what are the planned communication activities for the upcoming month.
– Page 12 includes a little surprise, just for you, and you will get a new one every month !
You have the ability to add any blank pages in the center of your blog planner… As many as your inspiration needs !-
Get ready, go !
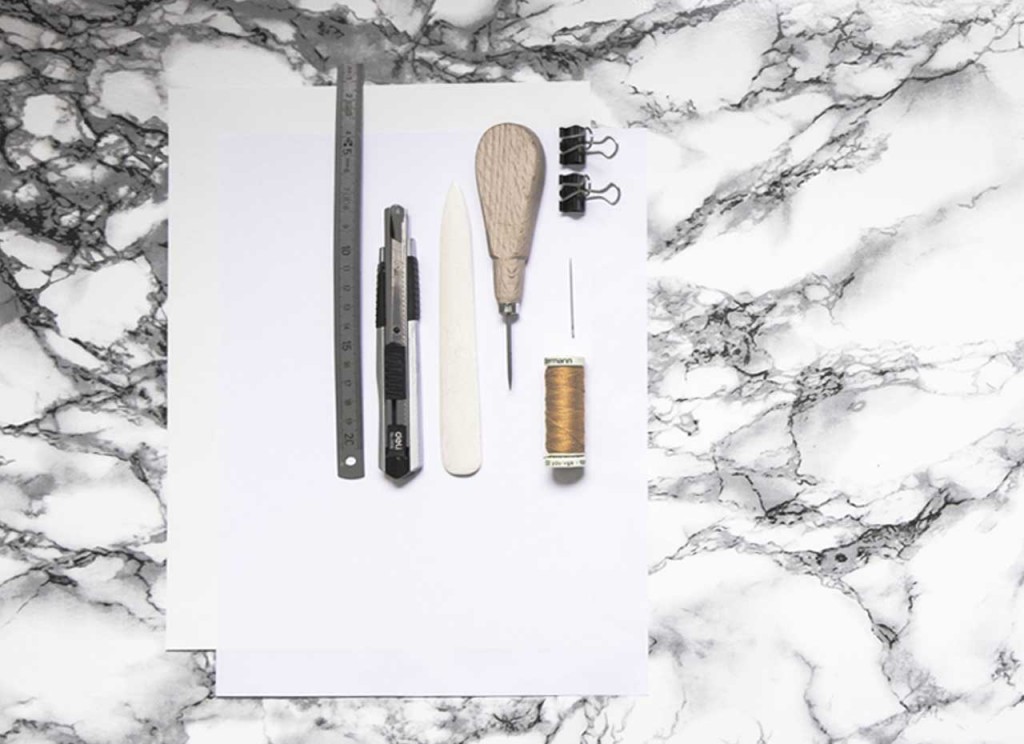 – 1 thick sheet of paper, A4 format (at least 180gr or 6oz) to print the cover.
– 3 thiner sheets of paper, A4 format for the inner pages (regular paper at 80gr or 3oz for instance)
You can choose paper from different colours if you’d like ! But not too dark or you will not be able to read the printed texts.
– 1 rule.
– 1 Cutter.
– 1 bone folder.
– 1 awl.
– 1 needle.
– Some colour thread of your choice.
– 2 little binder clips… or clothespins !-
Step-by-step…
Start by printing the cover page using the thicker paper and “landscape” format in your printer.
Keeping the “landscape” format, print the inner pages and select “Two-sided” option if you are lucky enough to have such feature ! If not, you first need to go to your printer option and select “print odd pages”, print, turn the stack over and print the “even” pages.
Now, follow what’s on the photo below: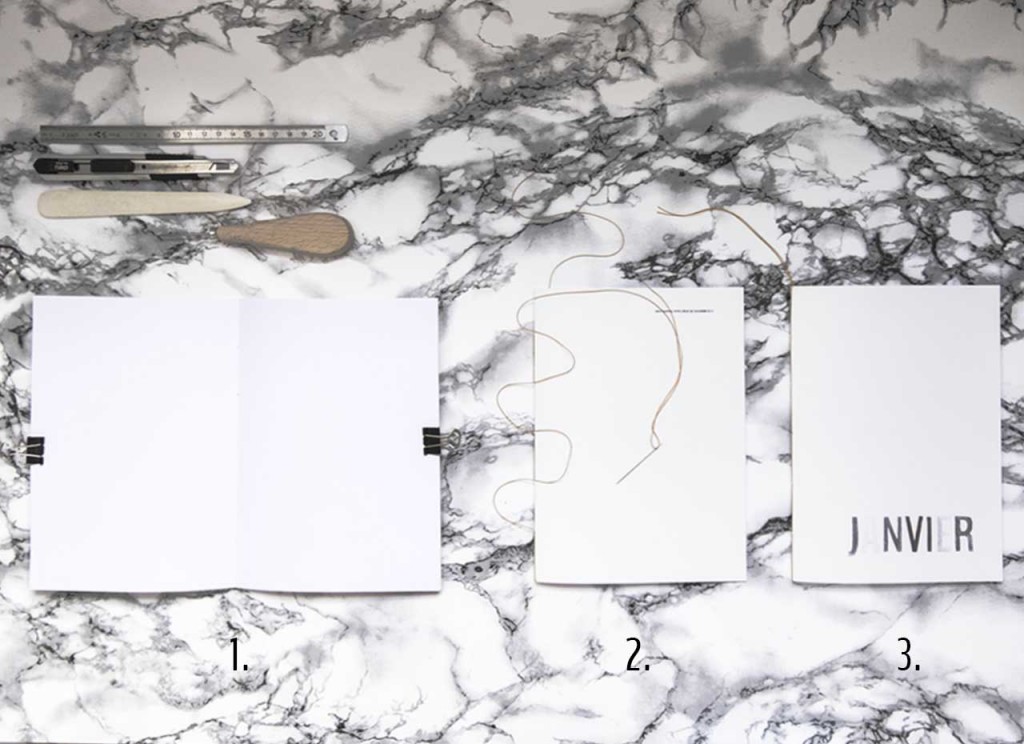 1. Grab your bone folder and fold your pages in the middle (where the lines are ending). If those middle lines are not properly centered after printing, it is time to adjust and cut out slightly the pages. Stack the sheets together in the right order. Adjust the position and fix using your binder clips.
Now using your awl, tear holes every 3,5cm (or 1.4-inch) along the folding line. The size of the paper being 21cm (or 8.5-inches), you should end-up with 5 holes.
2. Take your needle and thread through holes all the way from bottom to top. Turn when you reach the notebook border and thread in the other way. Your blog planner is sewed !
3. Tie the two threads at the bottom of the notebook together. Cut the thread or leave some to be used as a bookmark.
That’s it !-
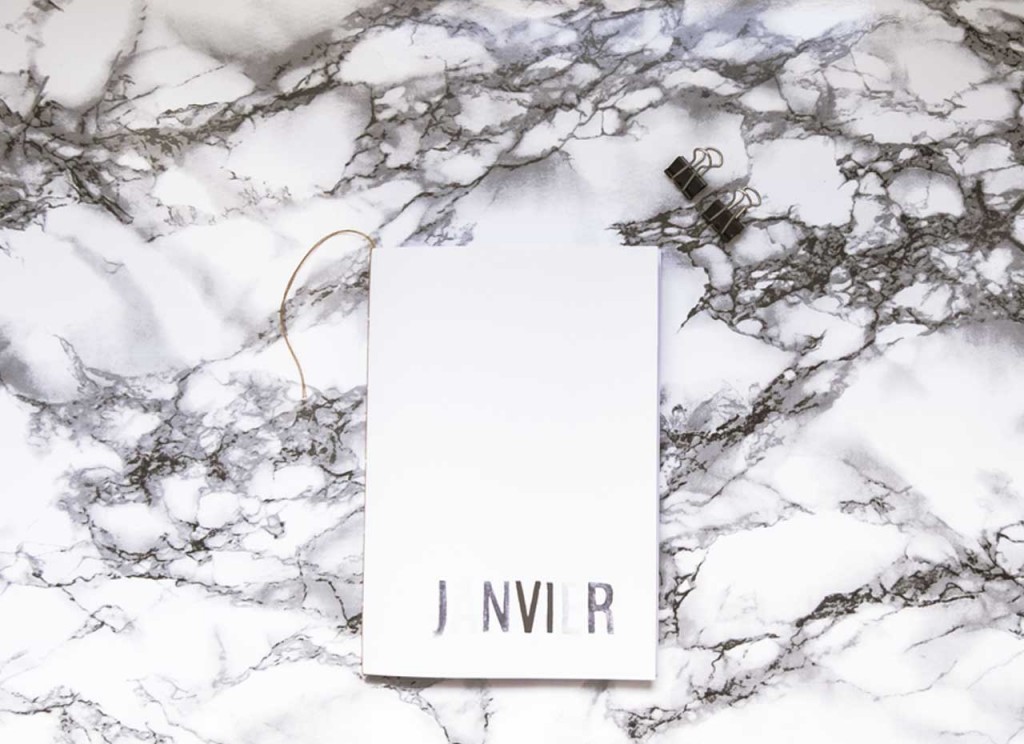
Et voilà, now it’s time to fill it out…
 What about you, how are you organized ?
(NØ) thought you maybe need something bigger… For the whole year ? Come here to print and customize your own nice illustrated Calendar !
-
-

( CALENDAR 2016 )
(NØ) is often late because she is always too busy mingling with a bit of draught and pieces of clouds or because she gets a bit lost on the (various) fantastic paths that cross her imagination (and winter time does not help with all this fog… even on those roads…). So yes, (NØ)‘s 2016 calendar only happens to come now!! To seek forgiveness, she has a surprise in
craft shopstore… To be release on Monday !-
To make your 2016 calendar, you need :
 – A printer.
– Some pretty paper, rather tick (> 180gr).
– 1 ruler.
– 1 Cutter.
– 1 awl.
– 1 knitting needle.
– Some string.
– Colour tools… Pencils, Watercolours, Gouaches…
– The calendar template to download here and print.-
Follow the steps:
 1. Print calendar pages on pretty paper. To print on A5 format, which is the original format of this calendar, go to your print settings and set to “actual size” and not “adjusted / fit to page” (If you choose “Adjusted / fit to page”, the calendar will be printed in A4 format). Equipped with your “laser” cutter, cut out along the cutting-lines.
2. Using your awl, mark holes at 1cm (0.4-inch) from the border, as shown on the picture above.
3. Customize the calendar, colour it, redraw it, watercolour it… One page, two pages, three pages… All pages…Up to you!
4. Sort calendar pages in the right order. Using your knitting needle, pass the thread through the holes. Tie. Hang.-
That’s over! And it’s pretty!


 (NØ) loves the month of November, because this is her birthday, the month of December, because – as a good girl – she gets a tons of Christmas gifts, and the month of April, because with Spring season coming, she can jump in puddles… Ooh… And also the month of June due to lemon sorbet she loves to eat… What about you, any preferred month?
Discover the little surprise (NØ) has prepare for you ! Have a look here !
-
-

( EMBROIDERED POUCHES )
In France, January celebrates the “mois du blanc” (popular French season around what is here called “blanc”: household textiles), so (NØ) decided to create a sewing DIY to make nice and white (or not!) embroidered (or not!) fabric-bags… You will be able to slip anything into it. Napkins, handkerchiefs or doilies to match (more…)
-

( CROWNED EPIPHANY )
Long live the kings… Long live the queens… Oops… No-t (enough) crown(-s) within reach ? Come over here, (NØ) is building some (tiny) little crowns with a sprout of paper, a slice of twine, coloured sticky labels and a piece of (glitter) sun… Not so much for making younger, older and the clementines (read till the end and you will understand) alike happy !
-
To transform paper into crown, you will need :
 – Some pretty paper, one rectangle for each crown you want to create, 4 inches x 6 inches is enough (9,5 x 16,5 cm).
– The crown template to be downloaded here.
– 1 ruler.
– 1 pencil.
– 1 cutter or thin scissors.
– 1 awl.
– Double-sided tape or paper glue.
– 1 tapestry needle.
– A little bit of wool or shiny twine or elastic thread.
– Coloured sticky labels and masking-tape for decoration…
– AND… A touch a fantasy of course !-
That’s easy, have a look :
 1. Download and print the crown template. Trace the pattern on the back of the paper. Carefully cut out the peaks using a cutter or thin scissors.
Using the awl, punch a hole on the marks to thread through your twine or elastic thread.
2. Stick the double-sided tape at one end of the crown. Roll. Remove the protective foil. Stick both ends together.
If you choose the paper glue, apply some glue at one end of the paper, on a 0.2 inch line (0,5cm) Roll. (Maintain both ends of the crown using a paper clip and wait for the glue to dry).
3. Thread the needle with the twine or elastic thread and tie a knot on one end. Thread the twine on the first hole then on the second one. Tie another knot to make the right length.
Add embellishment using coloured label stickers or masking tape, or both. That’s it! A sneak preview of the upcoming cruise-collections, honestly a lot more funny than the traditional fashion ones… Here is (NØ)‘s golden crown collection :
 And look at (NØ)‘s clementines who look so happy :
 What about you, how do you “wear” your crown ?
-
-

(HOLIDAY SNOWFLAKES)
*** To settle the lack of snow this Year, (NØ) has a solution to let your New Year’s Eve slip in a wintermood… DIY 3D Snowflakes, to offer your friends lacking the snow or to be used to “cool down” your New Year’s Eve decor table!!
-
To make the paper snowflakes, you need :
 – Some nice paper (do not to use thick or heavy paper as it may be difficult to fold and cut), colour drawing papers, iridescent paper, gray tracing paper, standard white paper… Up to you !
– 1 ruler.
– 1 pen.
– 1 awl.
– 1 bone folder.
– 1 cutter.
– Thread of your choice…
– 1 large sewing needle.
– Few beads… Silver, black&white, golden, just matching your paper colour…
– Some glue.
– A touch of fantasy and some imagination to create your shapes.-
Let’s go ! That’s fairly easy !
 1. Cut a 2×5-inch piece of paper (i.e. 5x12cm) for the small snowflakes, 3×6-inch (i.e 7x14cm) for larger snowflakes (or just any size you feel would work for you). Mark horizontal lines using your awl every two inches.
2. Define the fold with your bone folder and fold your paper in accordion.
3. Once your paper is properly folded, draw a pattern with a pencil, make sure you keep your pattern simple enough as you will need to cut it off with your cutter. Having complex shapes will make it difficult to cut and might lead to tearing up your paper. 4. Cut off along the traced lines.
5. Make a hole in the middle of your accordion paper using your awl, and thread through it (once right, once left) to hang up your snowflake (take a look at the picture above). Add few beads…
6. Open your accordion paper and glue the two extremities so that it stays open.-
That’s it !
 You can offer your snowflakes or hang them up on the window to create a soft winter atmosphere :


 You could also use them as a festive decoration for a pretty New-Year’s Eve table :
 (NØ) wishes you a lovely New-Year’s Eve under the (virtual and creative) snowflakes !
-
-

( (NØ)’S ADVENTURE #01 )
While waiting for Christmas Eve to come, here is a little animated surprise! Some pencil strokes, some sketched words, some colour stains, a
(NØ)narrative line… To be continued…


(NØ) catches some suspended air chunk to metamorphose winter’s frozen fog, waiting for the light to come. (NØ) wishes you a merry Christmas…
-

( GREETING CARDS )
Oooooh… (NØ) is late… And in a hurry for the traditional end of the year greetings, (NØ) offers you some wishcards you can customize ! Some small black&white drawings to colour or to glitter…
To get started, download the greeting card templates here, print and cut them out (you will find A5 cards and doubled cards to fold) …-
To customized your cards, you will need :
 – Some pretty paper (Canson Grain drawing paper, colorful paper, squared paper…)
– Scissors.
– Glue.
– Glitter powder.
– Coloured pencils or felt pen.
– 1 paintbrush.
– Some watercolours, gouaches or inks.-
Let’s get started with customization !
 For the glitter wreath greeting cards :
1. Apply glue where you want to stick the glitter dust.
2. Sprinkle the glitter over the wet glue, allow to dry, then tap of excess. For the colorful wreath greeting cards :
1. Apply the colour(s) of your choice within the flowers.
2. Boost the drawings with coloured pens.-
Et voilà :


 Today Christmas comes early, (NØ) is pleased to offer you some labels and tags matching your nice greeting cards… You can download the gift tags here and customize them the same way you did with the cards ! Your gifts will shine under the tree !


 (NØ) hopes you enjoyed this little DIY and cant’ wait to see your creations !
Looking for additional inspiration? Check out here.
-