
Today in the northern hemisphere is the winter solstice … The sun will rise late and set early! Fortunately, this also means that soon the length of the day will begin to lengthen … Faithful to ancient and pagan traditions, which (NØ) particularly like for their traditional charm, she invites you to celebrate the return of light by making little ones house shaped candle holders.
(NØ) guides you step by step :
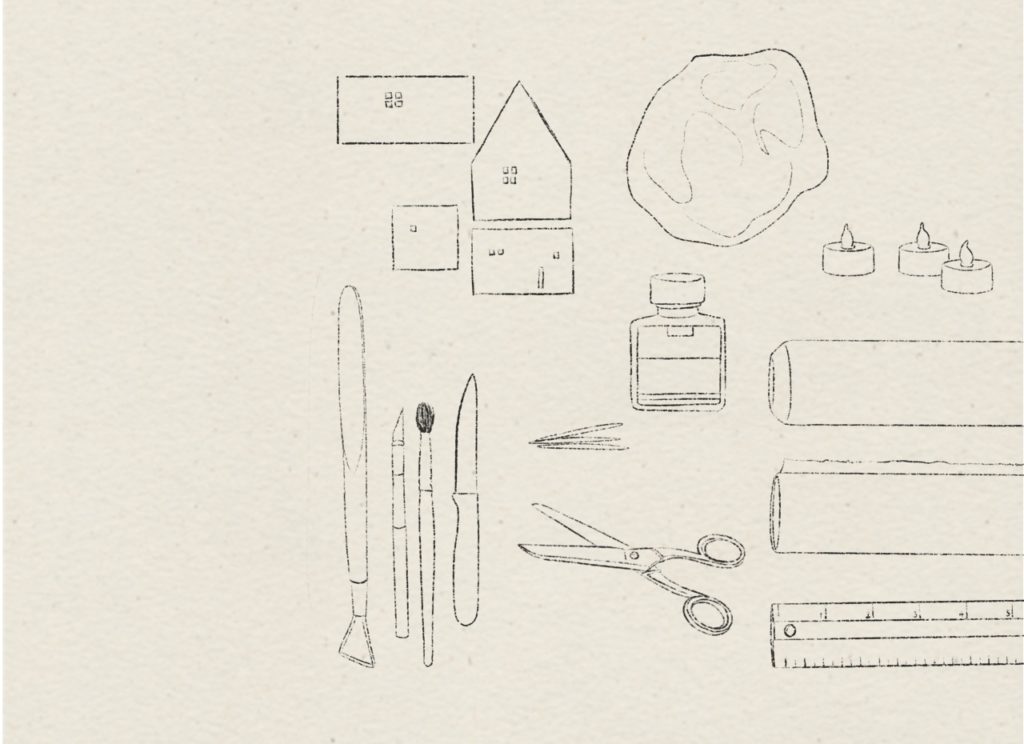
Material :
Here are all the things you will need to make your own Clay light houses.
By buying the suggested products via the links, you offer your support to (NØ)s creativity…
– The PDF of the Houses templates
– Cardboard
– Scissors or a cutter
– Some self drying clay, clay without firing, white, red, grey, black… something you fancy ! You will find the clay in a DIY shop !
– A small pointed knife
– A toothpick
– A rolling pin
– A brush and a smoothing tool
– Small LED tea lights that you can find on Amazon.
– Some varnish and a little patience …
Light House step-by-step :
When you have everything, here are the step-by-step !
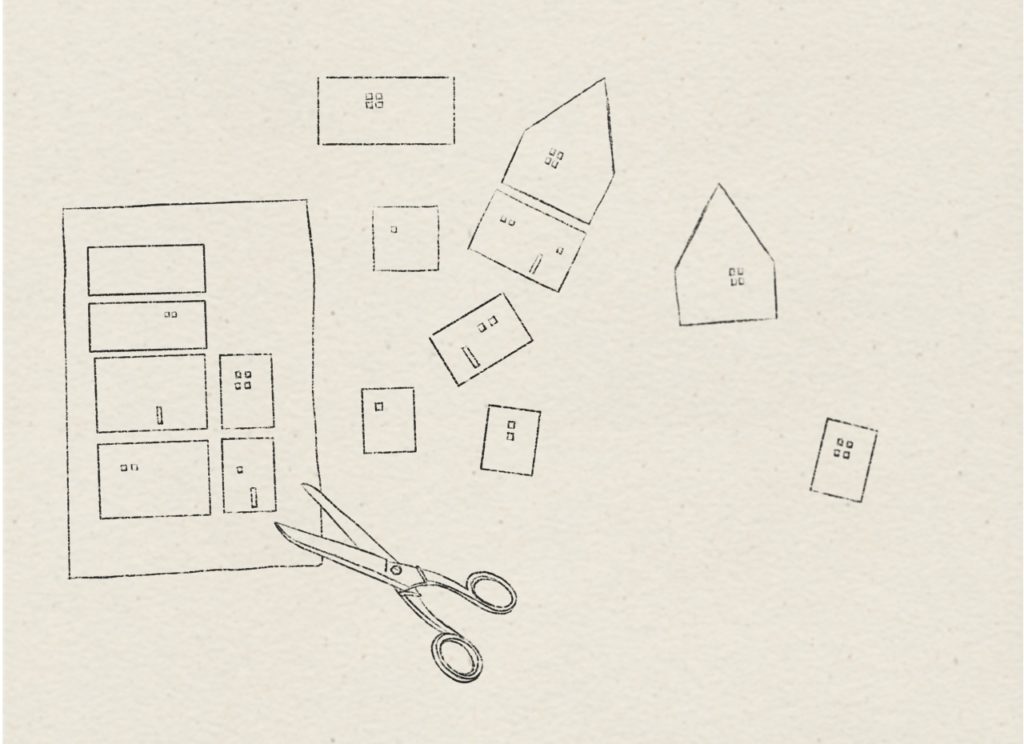
1. Print the template onto cardboard! Download the PDF.
2. Cut around it.
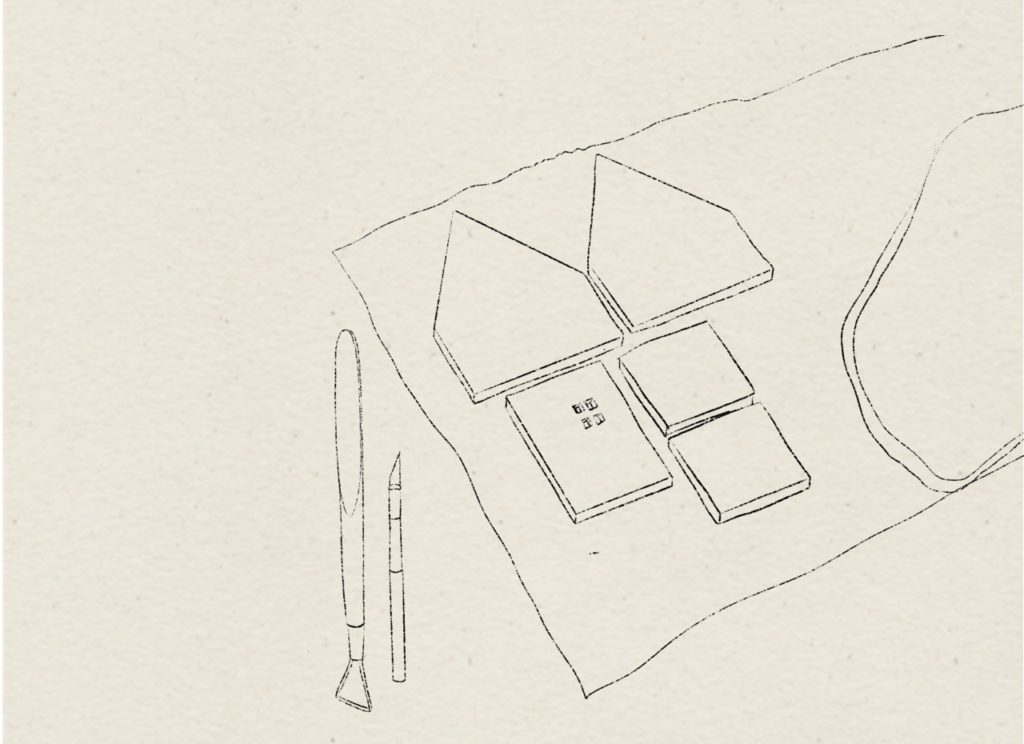
4. With the rolling pin, lay the clay…
5. Roll out until you get a regular plate about 5mm thick.
6. Lay the pieces onto the clay and use a knife to carefully cut around the shapes. Cut out the windows and the doors.
7. Gently detach the different pieces of the houses. Form a ball with the scraps of clay, you can reuse them by keeping them in a well sealed plastic bag so that the clay does not harden.
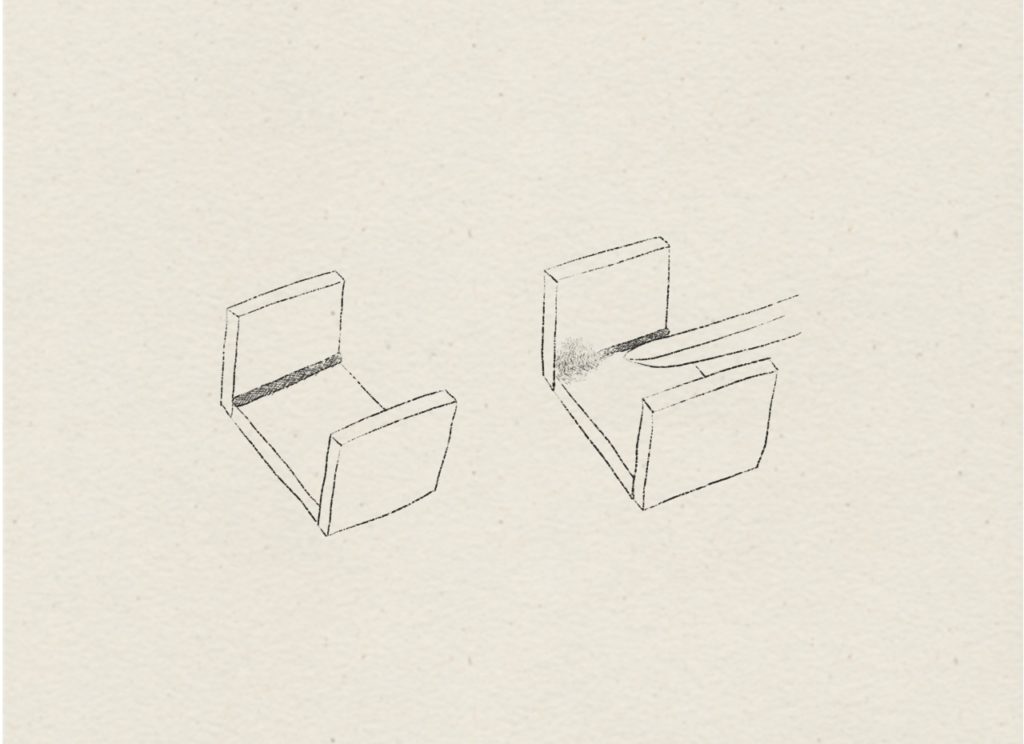
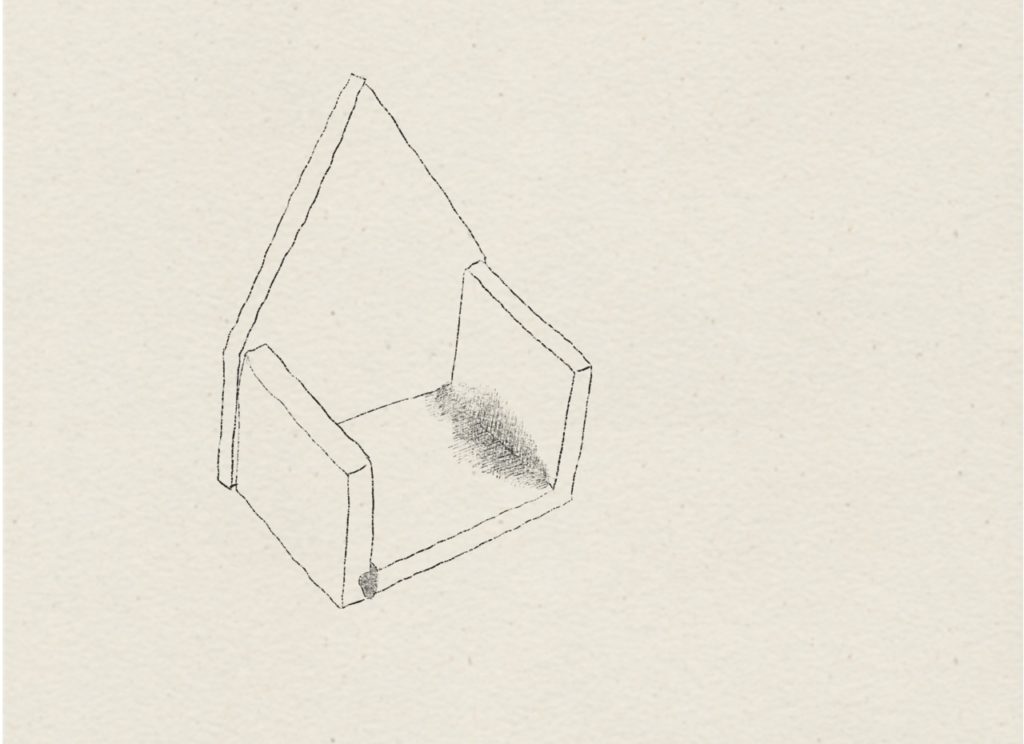
8.Scrape the sides to be assembled using the toothpick, make small notches in crosses so that the clay can adhere well.
9. With the brush, apply some water on both sides and a small piece of clay to assemble the different pieces of the house together.
10. Repeat for all sides of the house as well as the roof.
11. Let dry.
12. You can decorate your little houses by coloring them with a little acrylic paint, gold or silver paint …
13. You can varnish your homes to give them a shiny finish!
14. Light the candle and place the house on top … There you go! A small home-made village. To keep the clay that you have not used, do not forget to close the bag tightly.
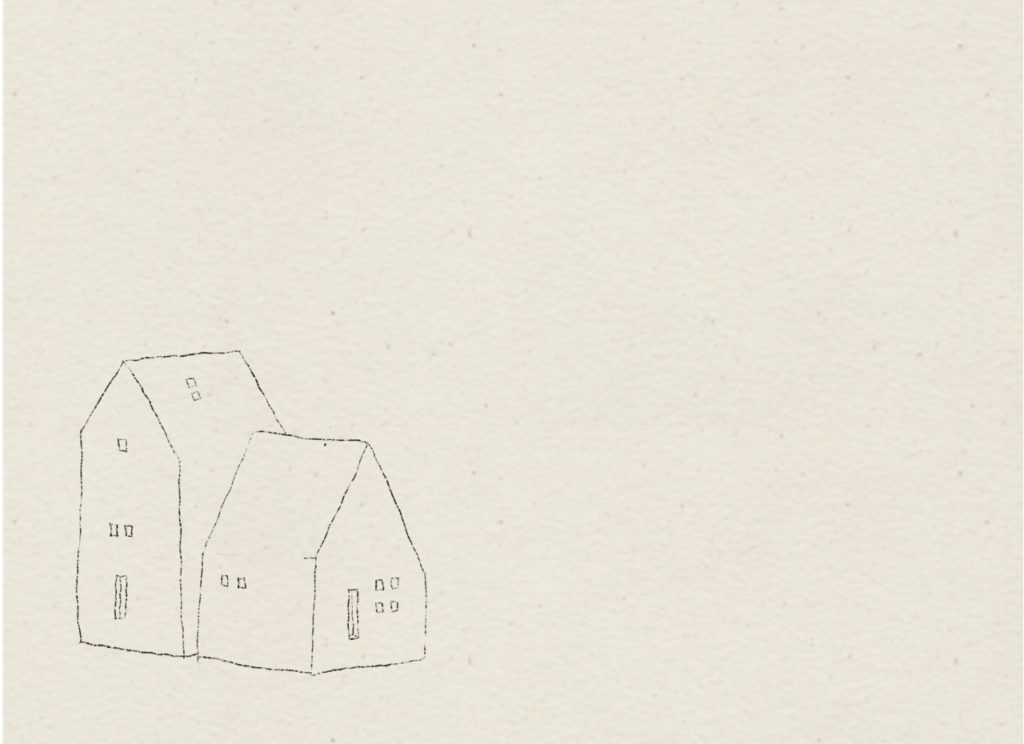
Here the clay-houses village :
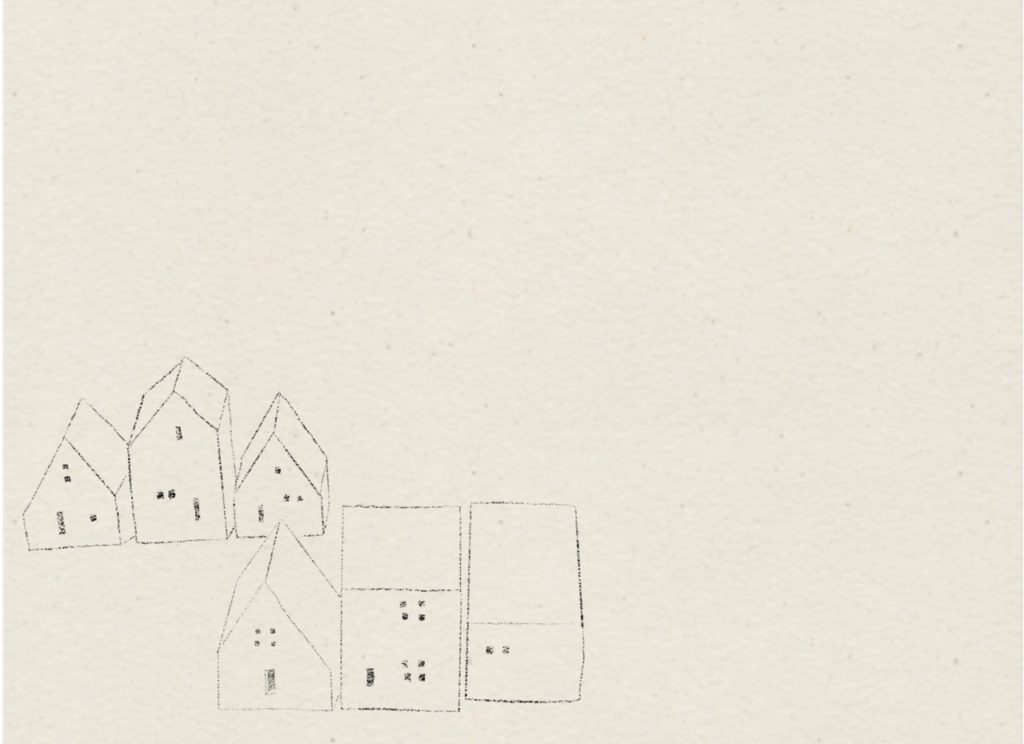
You can make different houses by letting your imagination or memories speak! Here is something to gently illuminate your winter days and nights … Don’t forget to show me your homes …